0%

CI/CD 從零開始 - 使用 CircleCI 部署 Node.jS App 到 GCP App Engine

身處在講求效率的時代,完整的開發流程當然少不了 CI/CD。什麼是 CI/CD 呢?CI ( Continuous Integration ) 中文為「持續性整合」,目的是讓專案能夠在每一次的變動中都能通過一些檢驗來確保專案品質。CD ( Continuous Deployment ) 中文則為「自動化佈署」,讓專案能夠自動在每次變動後能以最新版本呈現。
由於想要體會 CI/CD 到底有多方便,於是想要藉由實做一個簡單的 Node.js 專案來實際體驗看看。

內容架構

1.寫簡易的 Node.js Server
2.使用 CircleCI 整合 eslint/jest(CI)
3.使用 CircleCI deploy 到 GCP App Engine(CD)

NodejS Hello CICD demo

這是專案最終架構:

1
2
3
4
5
6
7
8
9
10
11
12
├── app.yaml 
├── babel.config.js
├── build
│ └── server.js
├── lint-staged.config.js
├── nodemon.json
├── package.json
├── src
│ └── server.js
├── test
│ └── server.test.js
└── yarn.lock

哇!看起來很複雜?別急,下面會一一帶你做一遍!

Step by Step

建立資料夾

1
2
mkdir demo-server
cd demo-server

初始化專案

1
yarn init

這時會出現問題問你,若沒有特殊設定可以一路按 Enter 就好,回答完後就會出現 package.json

這樣就能產生出 package.json 囉
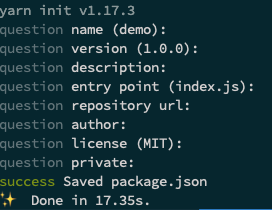
這樣就能產生出 package.json 囉!

開發專案少不了版本控制,這樣就能開始使用 git 了 🥳

1
git init

而不必要的檔案記得寫進 .gitignore 讓 git 忽略。

新增 .gitignore

1
node_modules

安裝 express 及 babel

express 是一個 Node.js 的後端框架,這次 demo 會用來處理 server。 由於 Node.js 處理檔案引入和匯出方法為 require 及 module.export , 而 es6 出現了 import 及 export,如要使用就要使用 babel 來 transpile。

1
2
yarn add express
yarn add @babel/preset-env @babel-node @babel/core @babel/cli --dev

babel 只有在開發會用到,注意後面要加 — dev。

建立 src/server.js

1
2
3
4
5
6
7
8
9
10
11
12
13
14
15
16
17
18
19
import express from 'express';

const app = express();
const { PORT = 3000 } = process.env;

const IS_TEST = !!module.parent;
// If there's another file imports server.js, then module.parent will become true

app.get('/', (req, res) => {
res.status(200).send('Hello!CI/CD!');
});

if (!IS_TEST) {
app.listen(PORT, () => {
console.log('Server is running on PORT:', PORT);
});
}

export default app;

本機跑起來

1
yarn babel-node src/server.js

babel-node 會在 node runtime 即時使用 babel transpile javascript。
這樣就能在 localhost 跑起來了 😌
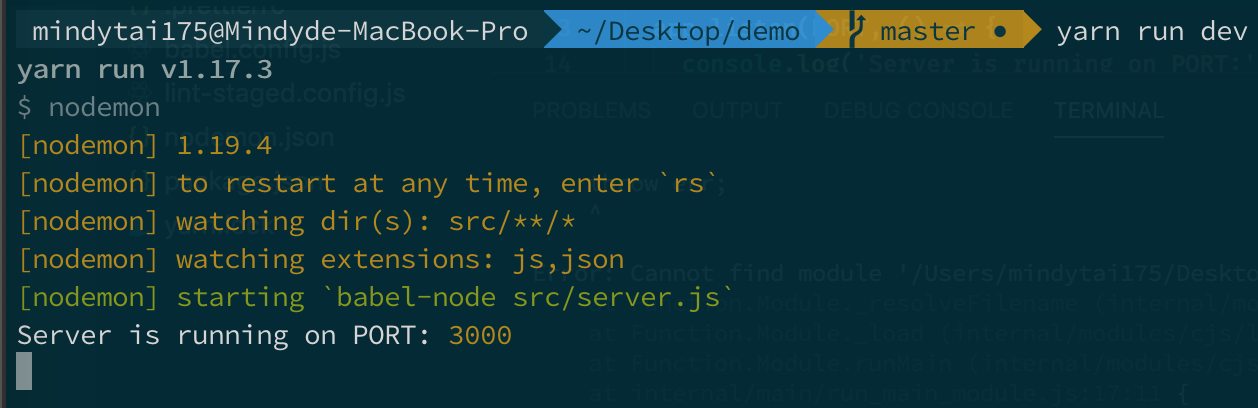
使用 nodemon 快速開發

nodemon 是一個無人不知無人不曉的開發 Node.js 專案的工具,nodemon 會隨時隨地監測程式,程式一發生變動就會自動重跑,重整網頁就能夠看到變化。

安裝 nodemon

1
yarn add nodemon --dev

新增 nodemon.json

1
2
3
4
5
6
7
{
"//_comment": "monitor src folder",
"watch": ["src"],
"//_comment": "watch .js and .json extensions",
"ext": "js json",
"exec": "babel-node src/server.js"
}

在 package.json 新增 script

1
2
3
"scripts": { 
"dev": "nodemon"
}

新增 test/server.test.js

1
2
3
4
5
6
7
8
9
10
11
12
13
14
15
16
17
18
19
20
import supertest from 'supertest';
import app from '../src/server';

const PORT = 3001;
let listener;
let request;

beforeAll(() => {
listener = app.listen(PORT);
request = supertest(listener);
});
afterAll(async () => {
await listener.close();
});

test('Server Health Check', async () => {
const res = await request.get('/');
expect(res.status).toEqual(200);
expect(res.text).toBe('Hello!CI/CD!');
});

這個結果就表示 test 通過囉 🙃

安裝 eslint 及 prettier

eslint 是 javascript linter 之一,可以用來預防語法錯誤,其實最大的好處是可以維持團隊的 coding style(ex. airbnb),但因為這次是個人專案這個優點就沒有被顯現出來了 XD

prettier 是要維持程式碼的整齊性,可以設定在存檔時程式碼格式化,統整團隊的規範。例如:要加雙引號還是單引號。

值得注意的是在同時引用 prettier 及 eslint 時,兩者會一些功能相衝突,而可以使用 eslint-plugin-prettier 解決這個問題。

設定 eslint + prettier + babel

開始著手寫設定檔 .eslint.js,這次 babel parser 會用到 babel-eslint,而在 extends 會用到 eslint-config-airbnb-base/ eslint-plugin-jest / eslint-plugin-prettier, eslint-plugin-import 是用來 lint es6 的 import 及 export。

1
yarn add eslint-plugin-prettier eslint prettier babel-eslint eslint-config-airbnb-base eslint-plugin-jest eslint-plugin-prettier eslint-plugin-import --dev

.eslint.js

下面有寫到常用的 rules,大家可以參考看看。

1
2
3
4
5
6
7
8
9
10
11
12
13
14
15
16
17
18
19
20
21
22
23
24
25
26
27
28
29
30
31
32
33
34
module.exports = {
parser: 'babel-eslint',
parserOptions: {
ecmaVersion: 2020,
sourceType: 'module',
},
env: {
node: true,
'jest/globals': true,
},
extends: [
'airbnb-base',
'plugin:jest/recommended',
'plugin:prettier/recommended',
],
plugins: ['jest', 'prettier'],
rules: {
'import/prefer-default-export': 'off',
'class-methods-use-this': 'warn',
'consistent-return': 'warn',
'no-unused-vars': 'warn',
'no-console': 'off',
'no-continue': 'off',
'no-bitwise': 'off',
'no-underscore-dangle': 'off',
'no-param-reassign': ['error', { props: false }],
'no-restricted-syntax': [
'error',
'ForInStatement',
'LabeledStatement',
'WithStatement',
],
},
};

.prettierrc

1
2
3
4
5
6
{
"semi": true,
"trailingComma": "all",
"singleQuote": true,
"arrowParens": "always"
}

這裡可以看到相當多的 error,若想要一鍵把所有 error 解決掉,可以加上 --fix

在 package.json 新增 script

1
2
3
"scripts": {
"lint": "eslint . --fix"
}

就可以一鍵跑 eslint 啦 🤪

避免糟糕的 commit

忘記先跑 eslint 及 test 就 commit 情形難免會有,這時候在 commit 之前先做檢查就變得非常重要。這專案使用的是 git hooks huskylint-staged

安裝 husky 及 lint-staged

1
yarn add husky lint-staged --dev

.huskyrc.js

使用 husky 跑 eslint 及 test。

1
2
3
4
5
module.exports = {
hooks: {
'pre-commit': 'lint-staged && yarn run test',
},
};

lint-staged.config.js

在 commit 之前會做到 eslintgit add

1
2
3
module.exports = {
'*.js': ['eslint . --fix', 'git add'],
};hus

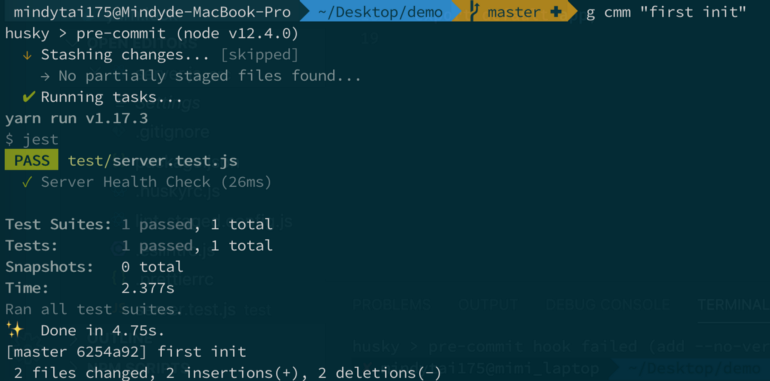
這邊可以看到 husky 幫我們先跑了 lint 後再跑 test 🤠

app build

最後一步是進行 build 的動作,build 在 Node.js 專案通常是拿來做 bundle 或是 transpile,讓 node 能夠認識我們寫的 code 。

1
2
3
"scripts":  {
"build": "rm -rf build && babel src -d build --copy-files"
}

p.s. --copy-files 會複製除了 js 以外的檔案,例如 .json

接下來就可以下指令了:

1
yarn run build

跑完後就發現多了 build 的檔案夾,

1
2
├── build
│ └── server.js

裡面有 transpile 過後的 server.js,點進去後會發現有一堆紅線等著你。

這紅線也太討厭了吧 (O

別慌,這時候新增 .eslintignore

1
/build/**

讓 eslint 別去檢查 build 出來的東西,紅線就會消失了!build/server.js 等等會拿來做 deploy 。
到這邊就完成了基本的 Node.js App 囉 🥳

CircleCI

circ因為是要透過 GitHub 進行 CI/CD,所以是以 GitHub 帳號登入 CircleCI。首先會先進到 CircleCI 介面,選擇你要 CI/CD 的專案。

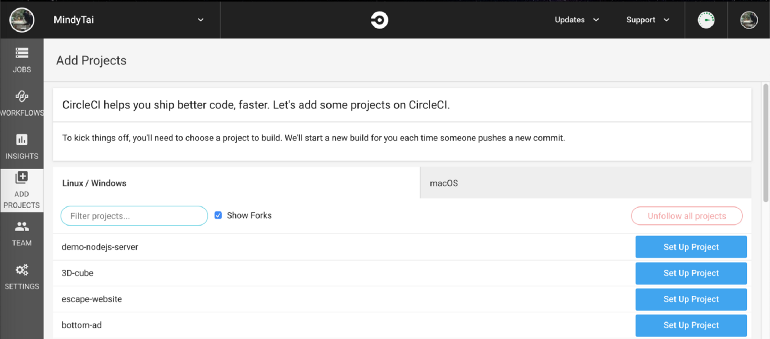
OS 我選擇 Linux (相較於其他二個最輕量),跑得比較快。因為是寫 Node.js,language 選 Node。

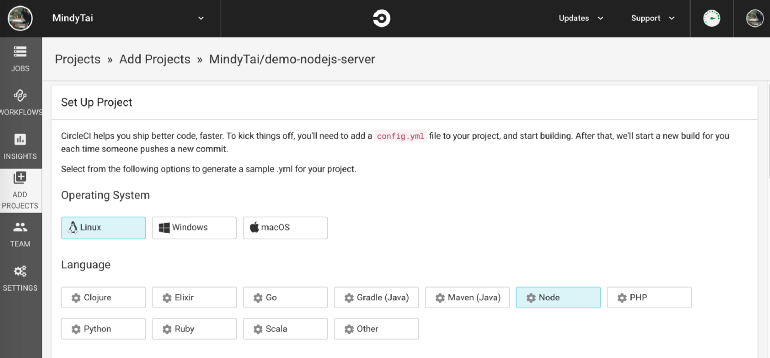
接下來設定在專案裡新增 circleci/config.yml,相關教學可以參考: https://circleci.com/docs/2.0/language-javascript/

1
2
3
4
5
6
7
8
9
10
11
12
13
14
15
16
17
18
19
20
21
22
23
24
25
26
27
28
29
30
31
32
33
34
35
36
37
38
39
40
41
42
43
version: 2.1 # use CircleCI 2.1
jobs: # a collection of steps
build: # runs not using Workflows must have a `build` job as entry point
docker: # run the steps with Docker
- image: circleci/node:latest # with this image as the primary container; this is where all `steps` will run
steps: # a collection of executable commands
- checkout # special step to check out source code to working directory
- run:
name: Check Node.js version
command: node -v
- run:
name: Install yarn
command: 'curl -o- -L https://yarnpkg.com/install.sh | bash'
- restore_cache: # special step to restore the dependency cache
name: Restore dependencies from cache
key: dependency-cache-{{ checksum "yarn.lock" }}
- run:
name: Install dependencies if needed
command: |
if [ ! -d node_modules ]; then
yarn install --frozen-lockfile
fi
- save_cache: # special step to save the dependency cache in case there's something new in yarn.lock
name: Cache dependencies
key: dependency-cache-{{ checksum "yarn.lock" }}
paths:
- ./node_modules
- run: # run lint
name: Lint
command: yarn eslint . --quiet
- run: # run tests
name: Test
command: yarn jest --ci --maxWorkers=2
- run: #run build
name: Build
command: npm run build
- persist_to_workspace: # Special step used to persist a temporary file to be used by another job in the workflow.# We will run deploy later,it will be put in another job.
root: .
paths:
- build
- package.json
- yarn.lock
- app.yaml

把 commit push 到 repo,CircleCI 就開始幫你跑 lint / test 並 build 喔!這時候 CI 就完成了!


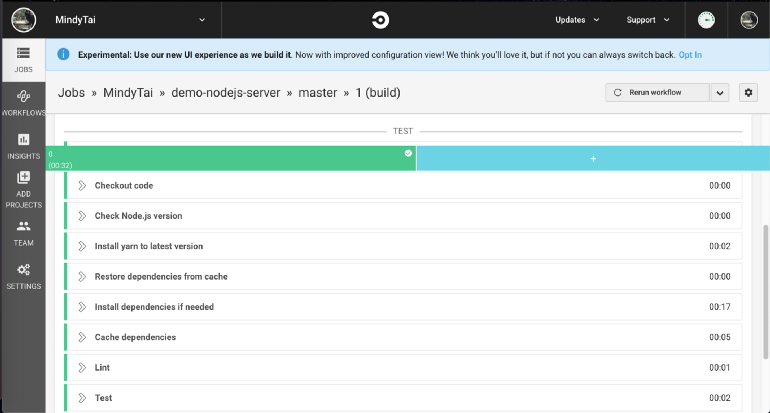
可以看到 lint 及 test CircleCI 都幫我們跑了!


成功囉!

我們將使用功能十分強大的 Google App Engine(GAE)進行部署,GAE 在處理大流量(load)時,例如訂票系統或是物流系統時非常適合。不但不用自己管理 load balance 的問題。Google 還會幫你自動開關 instances,使用者付費原則,用多少就付多少。

因為 GAE 是 Google Cloud Platform(GCP)下的一個服務所以若還沒有 GCP 先註冊註起來!新註冊的人可以享有一年 300 美金的試用,注意註冊時需要輸入一張信用卡才能開始使用,在試用階段 Google 並不會為向你收費,除非你主動跟他說要訂閱方案才會開啟收費流程。

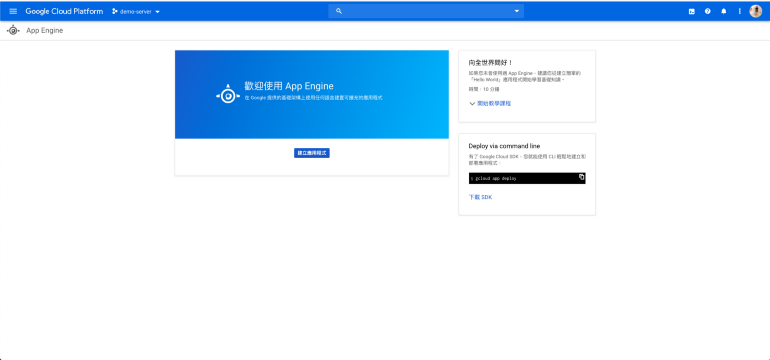
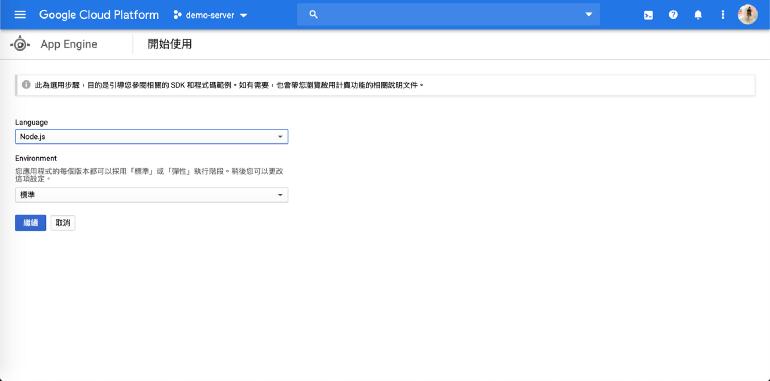
註冊完後我們就能夠開始使用 GCP 了,進到 Google App Engine(GAE) 畫面,接下來點擊 建立應用程式。

這裡可以選擇你用的機房在哪裡,雖然 Google 近年有在彰化新增機房,但是因為是免費用戶的關係,不能選擇,所以我選擇最近的機房 asia-northeast2(日本大阪),ping 較低,延遲會比較少。

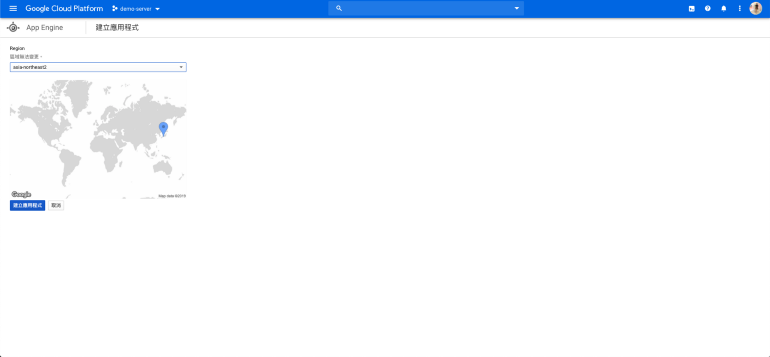
選擇你的專案是使用何種語言,環境若沒有特殊需求選擇標準即可。到這邊已經成功建立 App Engine 應用程式了!

但是要操作自如還要搭配 Google Cloud SDK,可以透過指令列工具來對 GCP 服務進行操作。這邊可以進行下載以及初始化的動作:

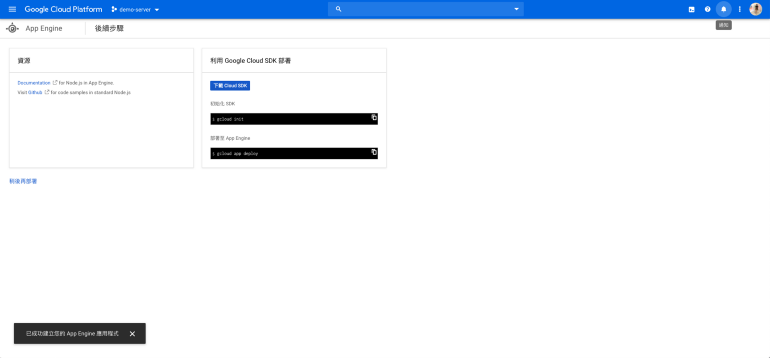
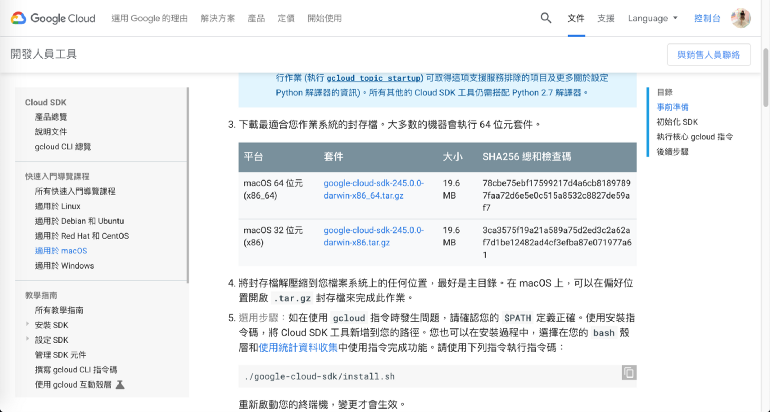
點擊下載 SDK 後選擇查看快速入門導覽課程後選擇 macOS 快速入門。

選擇 macOS 64 位元下載檔:

進到下載檔下 ./install.sh,會跳出 Welcome to the Google Cloud SDK!就表示安裝完成了。

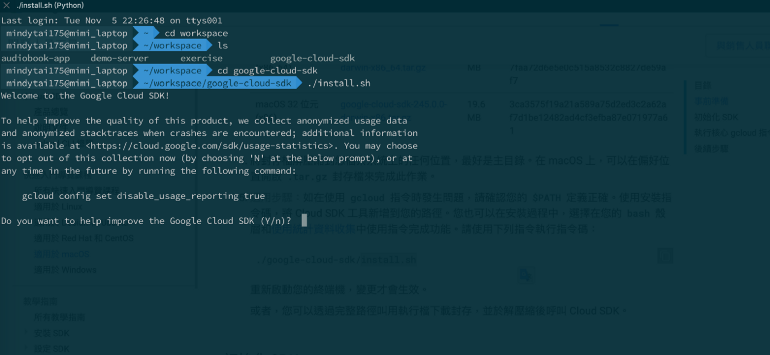
可以使用 gcloud -v 來確認是否真的安裝成功,正常的話,沒意外接下來就可以使用 gcloud 指令來進行操作了。

接下來照著說明文件開始 初始化並登入 gcloud SDK ,
就完成基本設定啦!

是時候來設定 App Engine 了,要設定 App Engine 需要有 app.yaml 檔。

這邊有簡易的設定教學可以參考: https://cloud.google.com/appengine/docs/flexible/nodejs/configuring-your-app-with-app-yaml?hl=zh-tw

若要更為詳細的可以看看這篇: https://cloud.google.com/appengine/docs/flexible/nodejs/reference/app-yaml?hl=zh-tw#general

這是我的 app.yaml 設定:

1
2
3
4
5
6
7
8
9
10
11
12
13
14
15
16
17
18
19
20
21
22
23
24
25
26
runtime: nodejs # Name of the App Engine language runtime used by this application
env: flex # Select the flexible environment

manual_scaling: # Enable manual scaling for a service
instances: 1 # 1 instance assigned to the service

resources: # Control the computing resources
cpu: 1
memory_gb: 0.5
disk_size_gb: 10

skip_files: # Specifies which files in the application directory are not to be uploaded to App Engine
# We just need build/server.js to deploy
- node_modules/
- .gitignore
- .git/
- .circleci/
- src/
- test/
- .eslintrc.js
- .huskyrc.js
- .eslintignore
- .prettierrc
- babel.config.js
- lint-staged.config.js
- nodemon.json

接下來,我們就可以手動 deploy 啦!

1
gcloud app deploy

在 CircleCI deploy

要透過 CircleCI 部署到 GCP,需要授權 Google Cloud SDK。在 circleci/config.yml 再加上

1
2
3
4
5
6
7
8
9
10
11
12
13
14
15
16
17
18
19
20
21
22
23
24
25
26
27
28
29
30
31
32
deploy:
docker:
- image: google/cloud-sdk
steps:
#info: https://circleci.com/docs/2.0/workflows/#using-workspaces-to-share-data-among-jobs
- attach_workspace: # Get saved data by configuring the attach_workspace
at: . # Must be absolute path or relative path from working_directory
- run:
name: ls
command: ls -al # list all files including hidden files and information
- run: #info: https://circleci.com/docs/2.0/google-auth/
name: Setup gcloud env
command: |
echo $GCP_KEY > gcloud-service-key.json
gcloud auth activate-service-account --key-file=gcloud-service-key.json
gcloud --quiet config set project ${GCP_PROJECT_ID}
gcloud --quiet config set compute/zone ${GCP_REGION}
- run:
name: Deploy to App Engine
command: gcloud app deploy

workflows: # A set of rules for defining a collection of jobs and their run order
version: 2
build-deploy:
jobs:
- build
- deploy:
requires:
- build
filters: # using regex filters requires the entire branch to match
branches:
only: master # only master will run

記得到 CircleCI 填入需要的 key, project_id, region

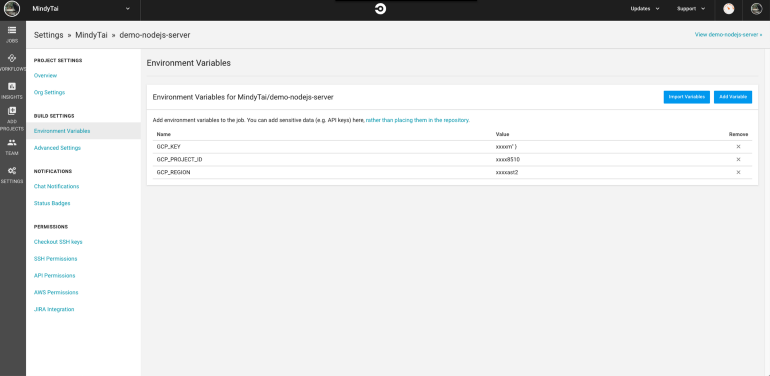
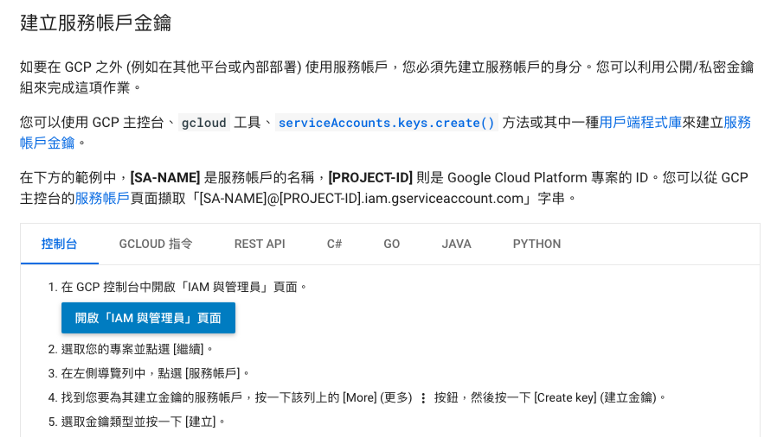
用到的 key 金鑰需要到 Cloud IAM 申請:

都填妥後,再 depoy 一次會出現下面這個 error:

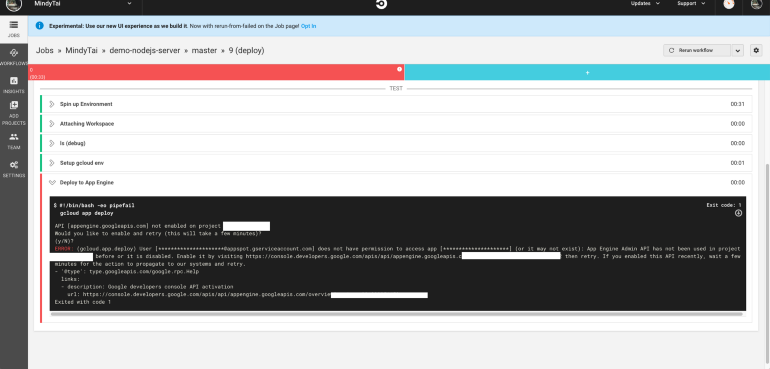
會產生這個錯誤是因為是用 GCP 的 service account 部署,而這會需要用到 App Engine Admin API,這個 API 預設會是 disable 的,這時把選項 enable 再 rerun CircleCI 就好。
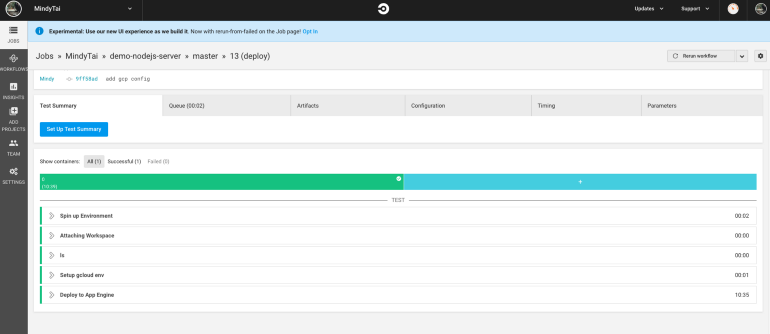
這樣就 deploy 完成囉 🥳

前人種樹後人乘涼

透過簡易的 Node.js server 完整跑一次 CI/CD 流程,發現設定好 CI/CD 能夠大大節省開發專案的時間,化繁為簡、提升效率,也能夠讓工程師專心在開發上,是個非常賺的投資啊 XD 減少 murmur 的時間(X)。 別等了!趕快在自己的專案加入 CI/CD 吧!

此篇同步發表於 👉 五倍紅寶石
GitHub repo 👉 https://github.com/MindyTai/demo-nodejs-server